Serials Editing Cards and Boxes
Editing
There will be times when you need to edit a checkin record, card or box or perform other operations like archiving and deleting.
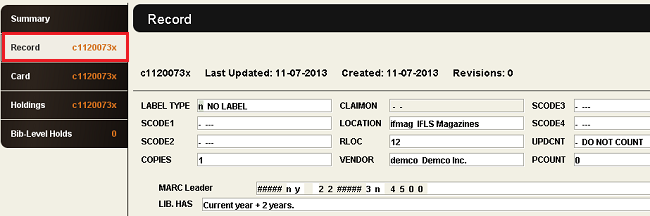
To edit the Checkin Record, with the bib record open, just click on the Record tab and make the changes needed. You may want to change the Library Has statement, or if this record is no longer used but items are still attached, suppress it by changing SCODE4 to “s”.
Click the Save icon to save your changes.
Editing Cards
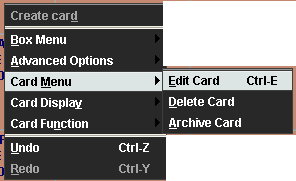
To make changes to the card, with the card open (Card tab selected), right click, go to Card Menu and select Edit Card.
The card will open and you can make changes.
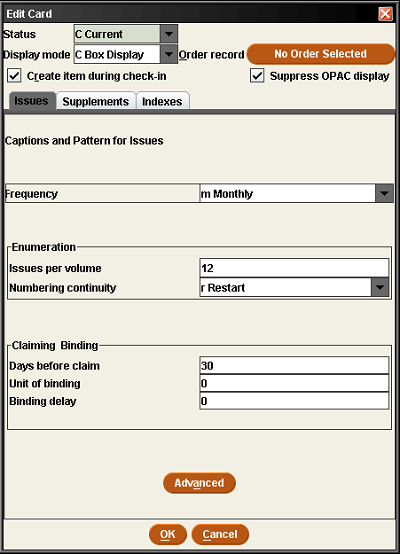
You can check the box for Create item during checkin if that was not done, change the Status to Filled if the card is filled, change frequency if that is incorrect or the frequency has changed or change the Days before claim if something else would work better for you.
Click OK; your changes are saved automatically and the screen will close.
Marking Filled
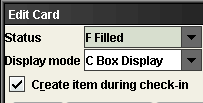
When a card is no longer being used and all the boxes are filled, you need to change the status of the card to filled. Do this when you are no longer subscribing to that magazine, or if you are creating a new card. If the card is for a weekly, the card will be automatically marked filled during the archiving process (see below). If there is more than one checkin card for your library attached to a bib record, only the one with expected issues should have the status of current; this tells the system which one to open when you select a bib record. If more than one card is “current” the record will open to the summary screen and you will have to choose which card you want to work on.
Right click on the card, select Card Menu and then Edit Card. Use the drop down arrow at the end of the status box to select Filled.
Suppressing Cards
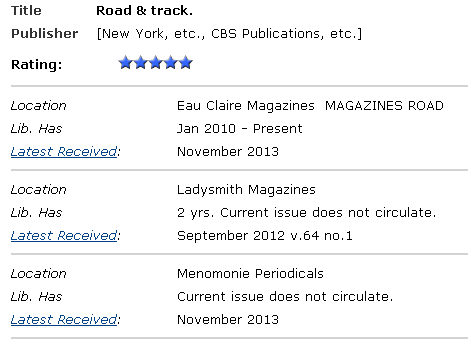
Checkin cards appear on the OPAC (online catalog) on the bib record display page under the title and publisher information. It displays the library location code, library has statement and the latest issue marked arrived on the card.
Each library should have only one checkin card visible on the OPAC. When a subsequent card is created and the previous card marked filled, that card needs to suppressed from OPAC display. To do this, from the open card right click, select Card Menu and then Edit Card. Check the box in front of “Suppress OPAC display.”
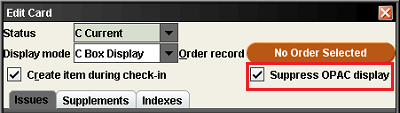
Click OK at the bottom of the Edit Card window; this will save your change and close the window.
Archiving Cards
When a card is filled and a new one needs to be created, the easiest way to do this is to archive the card. This is most commonly done with cards for weekly magazines as a new card is required at the beginning of each year. Archiving a card does several things at once that makes this transition easy; it marks the current card filled, it creates a new card and uses the publication information from the current card to populate the new card with correct information.
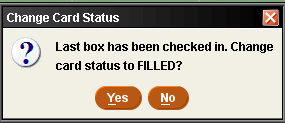
When you checkin the last box on a card, you will be asked if you want to change the card status to filled. Say Yes.
To archive a card, right click, select Card Menu, then Archive Card.

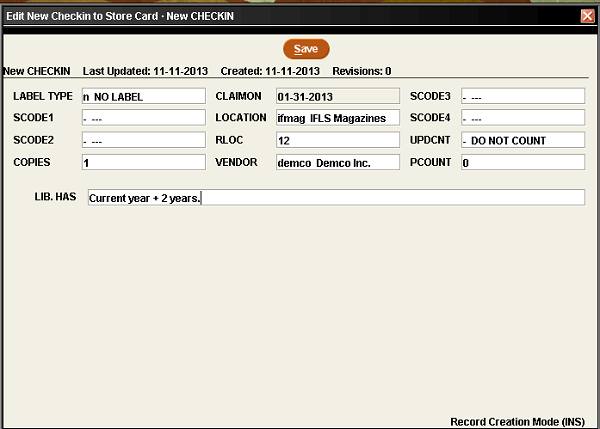
A new checkin card will open. If any changes need to be made to the card for the upcoming year make them here, then click Save.
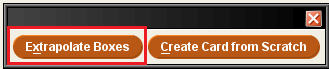
A box will pop-up asking if you want to extrapolate boxes or create the new card from scratch. Click Extrapolate Boxes.
On the next screen check the cover date and volume and issue numbers for accuracy for the first issue of the next year. Make any necessary changes, then click OK.
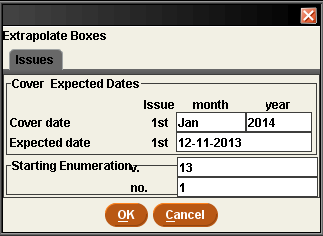
The new card will open with the same number of boxes as the previous one, with the same publication frequency and dates appropriate for the coming year.
Deleting Cards
When all the boxes have been deleted from a card you need to also delete the card. If a mistake is made in creating a card, it is sometimes easier to delete the card and start over than to try and edit to fix it. To delete a card, from the Summary screen, check to highlight the line for the card you want to delete, then click the Delete button.

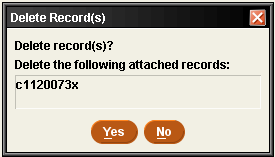
You will be asked Delete record(s)? Double check the record number to make sure this is the correct card, then say Yes. The card will be deleted.
Editing Boxes
The menu under Box menu allows for many different type of edits. If you need to edit the information on an individual box, you can double click on that box and the Modify Boxes Individually window will open and you can make your changes. You can also follow the route of right clicking, selecting Box Menu, then Modify Box Individually. The other things you can do from the Box menu:
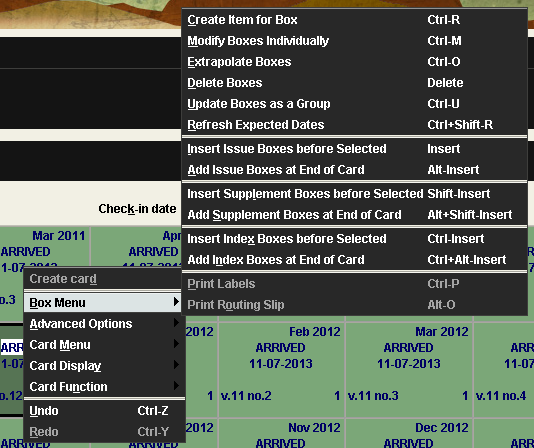
Create Item for Box – if the Create Item check box was not checked and an issue was checked in without creating an item, you can create an item for that box by clicking here. Once clicked the item template will open and you can create an item record as is normally done.
Extrapolate boxes duplicates a publication pattern. For directions on how to do this see the section on Unusual Frequencies on the Serials Checkin Cards page.
Delete boxes will delete any/all boxes selected along with the linked item records. For more informatin, see below.
Update boxes as a group makes changes to the selected boes. See more information below.
Insert issue boxes before selected. If an issue was missed, you can insert a box in the appropriate spot by highlighting the box after where it should go and selecting Insert Issue Boxes before Selected. A window will open where you will fill in how many boxes you want to insert; the cover date and volume and issue number will be filled in with what the sysem would expect them to be for the position on the card. Make any changes necessary to display the correct information, and click OK.
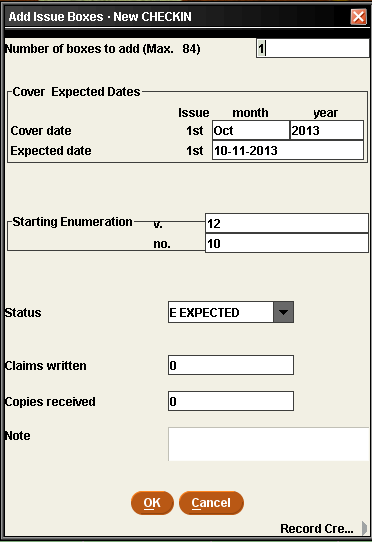
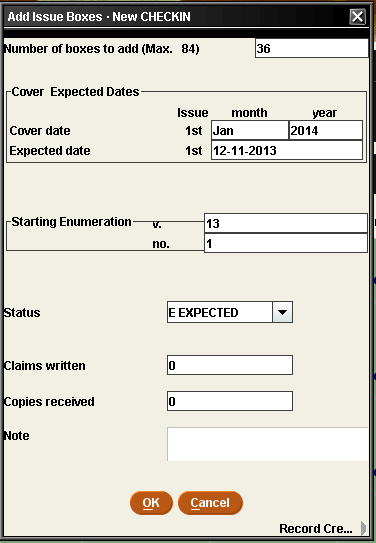
Add issue boxes at end of card. This is how you add another year of boxes when you get to the end of the boxes currently on the card. Normal procedure is to delete boxes from the top of the card as issues are withdrawn, and add boxes to the end of the card as long as the subscription is continued. (The exception to this is weekly magazines which require one card for each year.) When selecting this menu item the Add Issue Boxes window will open. At the top, add the number of boxes you want to add. You can add more than one year if you expect this subscription to continue; the max number of boxes a card can have is 84, so take into account the number of boxes already on the card when determining how many to add. The next anticipated cover date, volume and issue number will be filled in, continuing from the last box on the card. Check these for accuracy and make any corrections necessary. Click OK. The number of specified boxes will be added to the card.
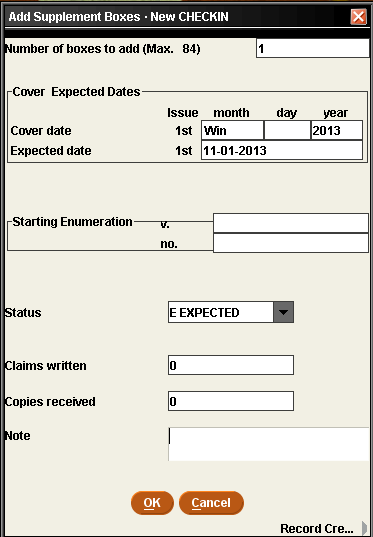
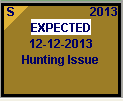
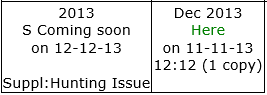
Insert Supplement boxes before Selected or Add Supplement boxes at end of card. Sometimes a magazine will have a supplemental issue for a special purpose that comes outside the normal publication. When this happens you want to add a box for the supplement. You would normally insert it into the pattern when it arrived, or you could add it to the end of the card. To insert, highlight the box after which you want the supplement to appear. Right click, go to Box Menu, select Insert Supplement Boxes before Selected. The Add Supplement Boxes window will open. At the top enter the number of boxes to add; this is typically one. Enter the cover date; supplement issues typically use seasons or sometimes just the year. Occasionally they have titles (Hunting issue, Top recipes of the year); you cannot enter these in the cover date. Enter the year in the cover date and type in the title in the Note box. The note will display in the box and on the card display in the public catalog. For the Expected date, enter the date you received it. If this issue has a volume or issue number, enter those. Click OK.
The box will be inserted where you indicated with an S in a triangle in the upper left corner of the box to indicate it is a supplement.
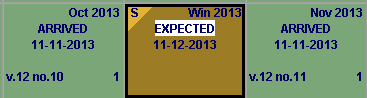
If the issue had a title, the box in Sierra and public display in the catalog will look like this:
Insert index boxes before selected or Add index boxes at end of card are very similar to supplement issues and would be added the same way. Indexes are very rare for the magazines that public libraries usually carry.
Updating Boxes as a Group
There are times when a change needs to be made to a large number of boxes on a card. Instead of updating boxes one by one, you can use Update Boxes as a Group. This can happen when a card is first created and you discover the volume number is wrong. You want to correct the volume on all boxes on the card. First, highlight all affected boxes, then right click, go to Box Menu, then Update Boxes as a Group. Change the volume number in the Enumeration box; when you do, a check mark will appear in box to the left indicating this is the field you want to change. Click OK. All highlighted boxes will be changed with the updated volume number; if there is more than one year being changed, the volume number will increase according to the number of issues per volume indicated on the card. The same type of change can be made if the issue number is wrong. Follow the same steps, correcting the issue number for the first box you have highlighted.
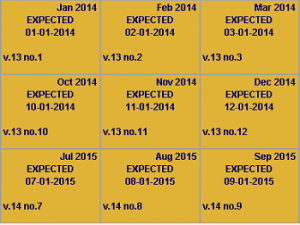
Another example is if the wrong expected date is showing so all the issue boxes will be late before the magazine has a chance to arrive. HIghlight all affected boxes, right click, go to Box Menu and Update Boxes as a Group. Change the Expected date to one that corresponds to the Cover date. Click in the box for Expected date so a check mark appears indicating this is the field you want changed; a check mark will also appear in the Increment transaction dates so all the boxes will be changed in the same way according to each cover date. Click OK.
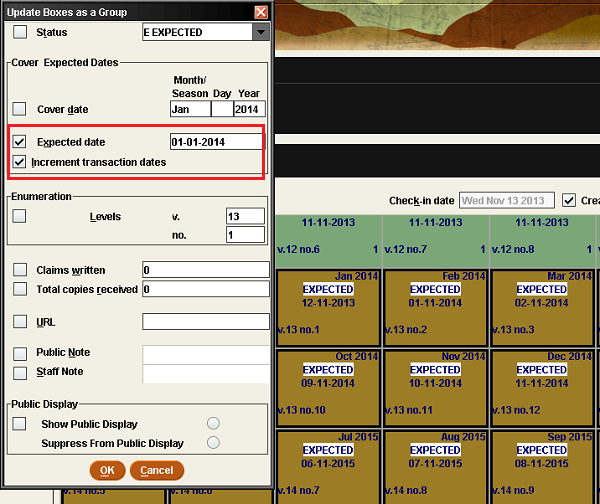
The Expected dates now correlate correctly with the Cover dates:
Editing Item Records
If you need to edit or look at the item record attached to a box, double click on the box concerned to open the Modify Boxes Individually screen.
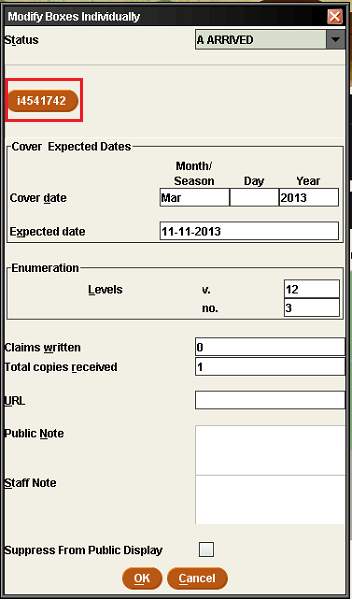
The button with the .i number near the top of the screen is the item record attached to this box. Click on the button and the item record will open.
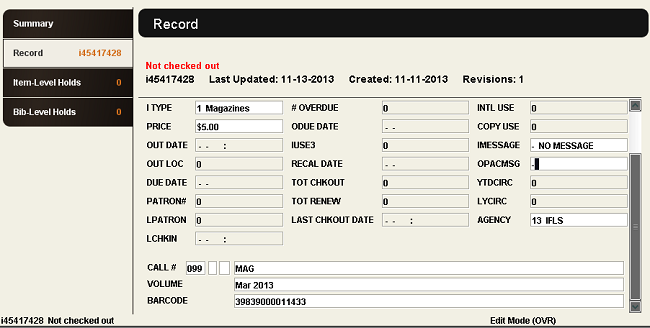
You can make any changes needed. Save the record.
If you want to look at the rest of the items attached to this bib, you can do that from this item record screen by clicking on the Summary tab.
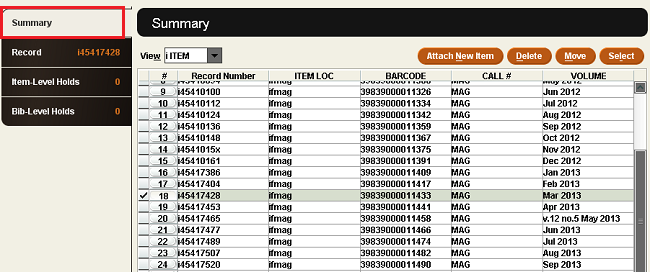
You can look at any other item record here.
When you are done, click the Close icon in the upper right corner to close the item window. You will be back at the Modify Boxes Individually window. Click OK to close.
Deleting Boxes and Items
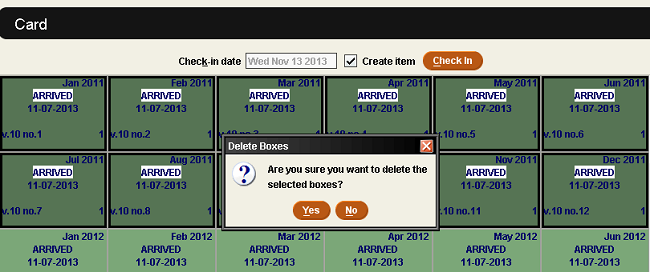
There are times when you will want to delete a box or boxes. If a box was created for an issue that does not exist, you can just delete it. To do this, highlight the box you want to delete and hit the delete key. Or, you can right click, go to Box Menu, and selected Delete boxes. You will be asked “Are you sure you wnat to delete the selected boxes?” Make sure only the box you want to delete is selected (highlighted) and click Yes.
If you will no longer be receiving a magazine, you will want to delete any remaining Expected boxes on the card so you don’t have to deal with late boxes and claiming issues that were never supposed to arrive. Highlight all affected boxes and use the delete key, or right click and use the box menu. When you are asked “Are you sure…” double check you have the correct boxes selected, and say Yes.

When it comes time to weed magazines, the item records must be deleted from Serials. This is done in one process with deleting boxes. It’s easy to delete a whole years’ worth of issues at one time. Highlight the boxes for the issues you wish to delete. Use the Delete key, or right click for the Box Menu and select Delete boxes. You will be asked “Are you sure?” When you know you have the appropriate boxes highlighted, click Yes.
If there are item records associated with the boxes being deleted, another window will open. The Delete checked items window lists all the item records associated with the boxes selected. By default, all items are checked to delete. You can uncheck an issue, but this is strongly discouraged. Since item records are linked to the boxes they were created from we do not want one to exist without the other. If there is some reason you don’t want to delete a particular issue, do not select it for deletion. Review the list to make sure these are the issues you wish to delete; there is no undo button. Click Submit. Boxes and item records will be deleted. The boxes will be gone from the card, the item records gone from the item summary screen.
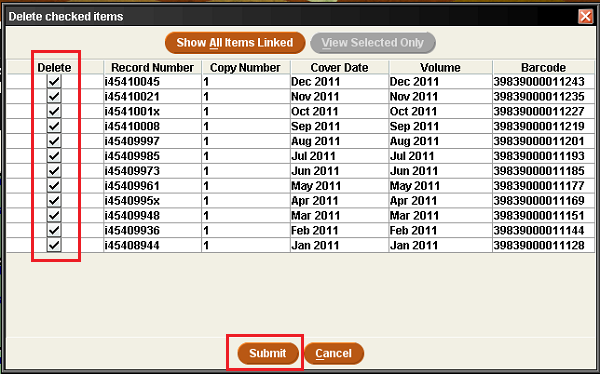
If you want to see all the item records linked to all the boxes on the card, click the Show All Items Linked button.
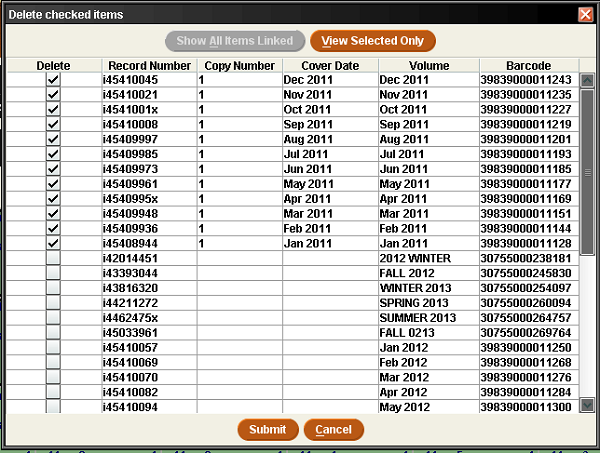
Click the View Selected Only button to go back to just those item records marked for deletion.
Click Save to save the changes to the card. NOTE: if you do not save, and say No to the Save changes? warning when you close the record, the boxes will remain but the item records are gone. When you click the submit button on the Delete checked items screen, that is when the item records are deleted; there is no undo or going back after that point.
Click Close to close the record.