Patron Records
Searching for patrons by name
You MUST check the database for the patron BEFORE adding a new record. Search for the patron name by typing nLast Name, beginning of First Name. Be sure to check all forms of the name (i.e. Richard or Dick, Robert or Bob), and note that a record may include only a middle initial, though full middle name is required by MORE’s Patron Registration Policy. Examples:
- Enter nSetter, Ka – this will pull up all records with last name of Setter and first name beginning with Ka, catching both Kathy and Kathleen
- Enter nSchultz – this will pull up all records with last name of Schultz, but may uncover a record for Liz, previously registered as Elizabeth
- Enter nThompson, Brad – this will pull up all records with last name of Thompson, first name Brady, whether or not the full middle name was entered previously
There should be one patron record for each person in the database. If the patron has moved and has fines from another library, update the address, home library, county, patron type, and ACT150 information but leave the fines intact. If the patron has fines over $10, they must be paid before the patron can have full borrowing privileges. Questions can be directed to the MORE Administrator. If patron is not in the database, follow these procedures for entering the registration. See also MORE’s Patron Registration Policy.
Searching for patrons by phone number
Patron records can be retrieved using the phone number entered into the patron record. The phone number must be present in either the TELEPHONE or TEXT MESSAGE NUMBER field in the patron record to be retrieved.
To retrieve patron records by telephone number:
- From Sierra’s Check Out (Circulation Desk) function, select the Search button next to the “Key or Scan Patron Barcode” field
- In the “Find a patron” window, select “f PHONE NUMBER” from the dropdown menu
- Enter the patron’s phone number, including area code. Hyphens and other punctuation are allowed but not required; for example, both 7158395082 and 715-839-5082 will return the same patron record
- If more than one patron record matches the phone number search, double-click on the patron record entry to open the record
Or:
- From Sierra’s Check Out (Circulation Desk) function, enter “f” and the phone number in the “Key or Scan Patron Barcode” field:
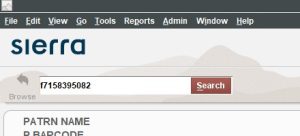
- Hyphens or other punctuation are allowed but not required; for example, both 7158395082 and 715-839-5082 will return the same patron record
- If more than one patron record matches the phone number search, double-click on the patron record entry to open the record
To search for patrons by patron record number, see: Record Numbers
Creating a new patron record
From the Check Out (Circulation Desk) function, click on New. Your library’s default patron template will appear.
Fixed-length fields: one value
EXP DATE: Expiration date – Fill in the expiration date to expire on the patron’s birthday closest to one year from the date you are entering the record. Click Next. As each box appears, fill in the appropriate information, or click Next if the default information is correct. HINT: by double clicking in any box you will be given your choices for that field; just click in the appropriate box.
DOWNLOADS – This field is currently not in use. It could be used to restrict access to content requiring authentication with the proper vendor set-up.
COUNTY– enter the code for the county in which the patron resides.
P TYPE: Patron type– enter the patron type for the person receiving the card. Patron type codes are used to control the way the card works (see Patron Limits/Patron Blocks), as well as for statistical purposes.
The most common patron types are 1=juvenile, 2=adult. These are shared among most MORE-member libraries, except:
- Some libraries have a unique set of p types: Eau Claire (31 and 32), Chippewa Falls (33 and 34), and Menomonie (19 and 20). P Type should match home library (details follow). So, for example, if a patron’s home library is Eau Claire, they should have p type 31 (EC Juvenile) or 32 (EC Adult). This is primarily for collection agency purposes. Libraries working with collection agencies may occasionally change a patron’s p type after initial registration.
- 23=noncharging juvenile and 24=noncharging adult are no longer used.
- Institution (14) and Institution non-charging (22) P Types do work differently from other types. See MORE’s Instution Card Guidelines for information and a sample policy.
- Other P Types, like Teacher (5), Homeschooler (6), and Seasonal resident (15) may be used primarily for statistical purposes. See the Patron Blocks table to determine how P Types affect lending rules, if at all.
- Patrons receiving delivery services from the library (homebound patrons, for example) may be assigned unique patron types for statistical purposes and/or to enable certain system features.
- Library accounts for internal staff use should use P Type Library Department (13)
BIRTH DATE– enter patron’s birth date by placing cursor at beginning of line and typing in month and day without hyphens (date will be correctly placed). To add a 19xx birth date, backspace two spaces over the default 20, and type 1 to bring up 19xx, then finish adding the date.
HOME LIBR: Home library– if the patron lives in a municipality with a MORE library, enter the two-letter code for that library; if patron lives in a municipality without a MORE library enter the code for the library they will be using most often. In some cases, a municipal resident may use a non-local library more often than their local library. In those cases, staff may designate that more-used library as their home library.
MBLOCK: Manual block– an entry here blocks a patron from placing holds and checking any items out. It is not often used at the point of entering a record, however if one of the situations applies, such as a suspected wrong ACT150 code, enter that code so it can be corrected before the patron checks anything out.
Act 150 LOC: Place of residence – this field is VERY important for statistical purposes. The patron’s place of residence, whether it is a city, village or township, will have a unique code which can be located by double-clicking in the field. All codes are also listed here. They are listed alphabetically by cities and villages first, then townships by county. The /y, n, or x indicates rural residency for Act150 statistics. Not sure what city, town, or village the patron lives in? Use the tools on this page.
Notice Preference: This is a fixed field that determines the method for patrons to receive hold pickup and overdue notices:
z – EMAIL: Email notices. An email address must be present in and EMAIL ADDR field.
p – PHONE: An automated phone call. A phone number must be present in a TELEPHONE field
t – TEXT MESSAGE: Text messages (SMS). A number for receiving text messages must be present in the TEXT MESSAGE NUMBER field. A patron with a notice preference of t – TEXT MESSAGE can receive both text notices and phone or email notices. There are additional steps if a patron wants ONLY text notices.
To receive text messages only: Assign a notice preference of t for TEXT MESSAGE. Do not include an email address in the EMAIL ADDR field (optionally include the email address in a note field) and add ## to the front of the number in the TELEPHONE field.
a – PRINT: Rarely used, only if the patron cannot receive notices another way
None (-) does not mean the patron does not want notices, it means they have no preference outside the system default: email, phone, then print.
Variable-length fields: free-text entry
Continue to fill out the information, using CAPITAL LETTERS and NO PUNCTUATION anywhere except for the comma inserted between patron’s last name and first name.
PATRON NAME–Enter the patron‘s preferred or current name as the first patron name field, and their legal or former name as a second name field:

The name in the top field will appear on notices and in the patron‘s account online, but the legal or former name will also trigger a duplicate check or be retrieved on search.
For individuals, use the format: Last name, First name, Middle name followed by no punctuation. Name must be in all capital letters! Examples:
- SMITH, JOHN JAMES
- SMITH, JOHN JAMES JR
- PARKER-SMITH, JOHN JAMES
- RIVERSIDE ASSISTED LIVING
LEGAL NAME – Another option for including both a patron name and a legal name is to enter the current or preferred name in the PATRN NAME field and the legal name in a LEGAL NAME field. The top name in a PATRN NAME field will appear on notices and in the patron‘s account online, but the legal or former name will also trigger a duplicate check or be retrieved on search. Using a LEGAL NAME field rather than multiple PATRN NAME fields may be helpful for staff in differentiating names in the record.
ADDRESS– Enter patron’s CURRENT mailing address (all notices will be sent to this address). This address is also for temporary residents (college students, etc.) as well as summer residents. Use USPS abbreviations when inputting information – APT, RD, ST, PO BOX, RR, STE, BLVD, etc. – and proper placement of PO BOX line (immediately above the city state zip line, which is typed with two spaces between the city and state and zip). Example: 123 PARK AVE S APT 106 HICKORY GROVE(space-space)58492 For institutions, include a responsible individual’s name on the first line of the address field, if in accordance with local policy.
ADDRESS2 – If the patron has another address (permanent home address, parents at two addresses, etc.) enter it here.
TELEPHONE – Enter the patron’s home telephone number, which will be the number that is used for the automated telephone notification system (Teleforms). Use dashes between the numbers. Ex: 715-555-1212. Do not add any extra text to this line. If a patron only uses a cell phone it is fine to enter it here, but do not add (cell) to the line. Do not enter a work number here.
Leading characters (ex. ## or ###) prevent MORE’s automated calling system (“TNS”) from placing calls to the patron. If the patron’s notice preference is t – TEXT MESSAGE and there’s a number present in the TEXT MESSAGE NUMBER field, the patron is receiving notices by text message. Leading characters may also indicate an incorrect phone number, or libraries managing telephone notices to their patrons locally.
TEXT MESSAGE NUMBER – Enter the patron’s phone number to receive notices via text message. When entering a number for receiving text messages in the TEXT MESSAGE NUMBER field, it doesn’t matter if hyphens are included or not, but using hyphens is preferred—it’s more readable! The notice preference must also be t – Text Message. To receive text messages only: Assign a notice preference of t for Text Message. Do not include an email address in the EMAIL ADDR field (optionally include the email address in a NOTE field) and add ## to the front of the number in the TELEPHONE field.
ID – As of November 2017, ID numbers may no longer be stored in MORE’s electronic patron records.
P BARCODE: Patron barcode – Scan or enter the barcode number of a new card into the system; this will be attached to the patron’s record as soon as it is scanned.
EMAIL ADDR: Email address – If the patron would like to receive notices by traditional email, enter their email address here. This will be the primary method used to notify the patron of overdues, hold pickups, or fine notices. All patrons with an EMAIL ADDR present will receive courtesy (“due soon” notices) by email. If patron does not want to be notified by email but the library wants to keep an email address on record, enter it in a NOTE field.
MESSAGE – Messages attached to the patron record will pop up and be seen by anyone viewing the screen when patron uses his/her card, so discretion should be used in entering data. Message field may contain information such as “Personal item left in library, see librarian.” Use the Pmessage field for these standard messages: No Message is the default. If any of the other messages apply, click on that square and click OK. That message will appear when the card is scanned in.
NOTE – This field should be used to enter juvenile patrons’ parent/guardian name(s), and may be used for additional general information regarding patron. Unlike a MESSAGE, this field does not pop up upon accessing a patron record, but can be found by viewing the full patron record.
PIN: Personal identification number – As of October 15, 2019, this field must be present for patrons to access their accounts via the MORE online catalog. A PIN can be set or re-set either in Sierra or via the online catalog. PIN notes:
- A PIN must be a 4-digit number
- Any number of users can have the same PIN
- “Trivial” PINs are not allowed, those with:
- A character that repeats consecutively three or more times (for example, 1111, 0004, 8777)
- A set of up to four characters that repeats consecutively two or more times (for example, 0101, 8484)
To create a new PIN in Sierra, select Edit to view a patron’s record. Select the Insert button in the upper right, then find the PIN (=) field from the index dropdown. Type in the PIN twice, as prompted, but note that it will not be visible as you do so. Select OK. The PIN field will appear in the record as a series of asterisks that do not correspond to the actual number of digits in the PIN.
To reset an existing PIN in Sierra, select Edit to view a patron’s record. Find the PIN field, right-click and select Edit Field. Enter the PIN twice, as prompted, but note that it will not be visible as you do so. Select OK. The new PIN will appear in the record as a series of asterisks that do not correspond to the actual number of digits in the PIN.
Patron Alias– this field is for those libraries that have open holdshelves for patrons to pick up their holds and use a manually-generated patron alias. This code prints at the top of holdslips to preserve privacy. If entered manually, the format is usually the first two letters of the last name, the first two letters of the first name, and the last four numbers of the telephone number. If your library uses a print template for holdshelf slips that automatically generates an alias, do not enter an alias field in your patron records.
INPUTTER– MORE requires staff members to enter their initials in the records they add to the database. When this field comes up, enter your two-letter library code in capital letters followed by a forward slash and your initials (Ex: PC/cb or DP/ks). Click Save/Close.
Using the ID scanner to create a patron record
ID Barcode Scanner Demo webinar, August 27, 2015 (submit a help desk ticket for a password)
If your library uses the DataLogic scanner that inserts information from a driver’s license the instructions are slightly different. When scanning the barcode on the back of a driver’s license, the following fields will be filled in:
- Expiration date
- Birthdate
- Name
- Address
There are two ways of using a patron template for new records:
- Have the template open with no prompts, scan in the information and tab or click from field to field to fill in the rest of the record; or
- Have the prompts appear for the other fields needed first, then scan in the license barcode to complete the record.
There is not a way to scan information in first and then have the prompts start. Before using the ID scanner for the first time contact MORE staff with your choice of which template type to use. In either case, for the variable fields, Name and Address must be the first fields listed; after that the other fields can be listed in the order you prefer. Please note:
- The expiration date in the template will be set to 01-01 and the next year. Each January the year should be set to the following year. The month and day will be set by the birthdate on the driver’s license, but the year is set by the template.
- The name and address will be exactly the way it appears on the license and may need to be edited; if only the middle initial is on the license the middle name will need to be filled in. If there are abbreviations in the address you may want to fill them out; ST for STREET, RD for ROAD, for example.
- In testing, some older driver’s licenses add 2 extra zeroes to the end of the zip code; check that and delete if present.
Template Choices:
- Patron template opens with no prompts. Driver’s license barcode is scanned and fields filled in:
Check name and address and edit if necessary (middle name must be filled out.) Check fixed fields and change where needed (County, Ptype, ACT150 Loc and Notice preference). Fill out the rest of the variable fields. Save.
- Patron template opens and prompts start. Fill them out until they stop, at which point the record will be open with the cursor at the start of the EXP Date field:
Scan the driver’s license barcode. Check the name and address for any needed editing. Save.
Editing a patron record
Scan in the patron barcode or type in the name to bring up the patron record. Click Edit. The full record will open. Click in any field to change the information. To insert a field not in the record, click on Insert. A drop down menu with an input box will pop up. Click on the down arrow to see all the fields available. Scroll down if necessary to see the end of the list. Click on the field you want to add. Enter the information and click OK. The field will be added to the information on the bottom part of the screen. When making changes to a patron record, add “updated,” the date, and your library and personal initials to the inputter field. For example: OG/lr; updated 8-15-2013 PF/te
Notes and messages
A note is meant to stay in a patron record for a longer amount of time. It can be seen in the brief display when a record is opened. It is used for information important to know about that patron. Examples are: Parent says only 2 DVDs at a time; No internet access until 11/30/08. ILL uses the note field for the funding Agency of out of system libraries. All notes must be dated and initialed. Please remember to delete the note when it is no longer needed. Notes can also be seen under the Fines tab by clicking on Patron Notes.
A message is in a pop-up window and must be acknowledged (click on OK) before it will disappear and you can continue working with the patron record. They are meant for short-term, need-to-resolve-now issues. If a standard Pmessage can be used, please do so. Other examples are: Verify phone number for TNS; Ask for email address. Messages must also be dated and initialed, and removed when no longer needed.
Special Patron Records
See the Special Patron Records page for information on working with:
- CVTC Student and Employee records
- MORE E-card records
- Durand student records
- Patron records with MBLOCK = z
Deleting a patron record
If you need to delete a patron record, open the record, click on edit, then go to File – Delete Patron Record. You will be asked “Delete patron record #12345678?” Say yes, if you are sure.
Manual blocks
This is the table of manual blocks (MBLOCK fixed field) that can be applied to a patron record if needed. Placing a manual block on a record means that patron will not be able to checkout items or place holds until the reason for the block has been resolved, so be sure you need to do it. If a message will suffice, use that. Here is an explanation for each code:
- ACT 150– You suspect the ACT150 code is wrong or their address is not clear for residency purposes and needs to be verified.
- Bad Check -When a patron has written a check that bounced and money is still owing.
- Citation– The patron has been sent a citation and court notice to return long overdue library materials.
- Duplicate Patron Record– When doing a name check on a patron, if there are two or more card numbers under their name, apply this block to all cards until the records can be merged with the current, correct information.
- ILL Overdue– patron has an ILL from outside MORE that is overdue.
- Missing/Damaged– When an item is damaged or missing on a patron’s record, this block is applied to alert the patron of the problem. The charges for the damage or the missing part must be paid for.
- No Checkout– the patron is not allowed to checkout materials (most often used on a juvenile’s card per the parents request).
- One Time Checkout – When a patron forgets their card and needs a 1 time checkout pass, this block is applied. The next time they come to the library they must have their card to check out.
- Address Block – Applied if mail is returned to us because it was undeliverable. When they come in, ask for current address.
- Block See Note– See the patron screen for explanation of block. Used when none of the other codes fits. Must add a note to explain the block.
- Collection– If a patron has at least one billed item and owes at least $25, some libraries send the account to a materials recovery service for follow-up billing. This service is currently used by Balsam Lake, Chippewa Falls, Eau Claire, Ladysmith, and Menomonie. NOTE: if a patron pays their fines at your library and part of the fine is the collection agency charge, that charge must be returned to the charging library, found in the patron type or home library field. See more information about working with patron records with a Collection MBLOCK
- First Time Checkout– This block is applied if a patron requests a library card and is unable to provide us with current address information. We will allow them to checkout a set number of items on their card and require that they bring in proof of address on their next visit to clear the block.
- Lost ID Block– Used by some libraries when a patron loses their card; identification is required from the patron if the lost library card is presented.
- Old Trans(action) Block– A charge (either fine or replacement cost) from new libraries joining MORE from their old circulation system applied during the migration. Something that was left on their card before the new system was implemented. These fines must be returned to the charging library.
Patron registration renewals
A past expiration date in a patron record is a flag for staff to check the patron’s contact and place of residence information, and update if needed. Except for some special patron types, an “expired” account does not have any effect on the online or in-person library services available to the patron.
- Verify address, phone number and email address (if available).
- Update fixed-fields (the upper section) accordingly, including ACT150 LOC, County, etc.
- Change the expiration date to one year from the date currently in the field, or one year from the renewal date–whichever makes more sense and is in keeping with your local practice. The point here is to regularly (approximately annually) verify the patron’s personal contact information.
If the ACT150 code remains the same, make the corrections to the address. If the ACT150 code has changed, they must fill out a new registration card; make all the necessary changes to the record.
Customizing the patron display
Staff can adjust the patron info display in the Check Out (Circulation Desk) function from Sierra’s Admin menu > Options > Patron Display. Submit an IFLS help desk ticket if your login doesn’t have access to Options. Custom display:
- You choose which patron record fields to display. PATRN NAME displays LAST, FIRST MIDDLE
- Requires scrolling to see more than 5 lines
- 1 column only
Brief display:
- Displayed fields cannot be customized. PATRN NAME displays FIRST LAST
- No scrolling
- 2 columns
Brief display w/ address:
- Displayed fields cannot be customized. PATRN NAME displays FIRST LAST
- No scrolling
- 2 columns
Linking patrons
Patron records in Sierra can be “linked” so staff can easily move between records linked together. The linked patron display shows the number of items checked out by the linked patrons, the patron address, and any money owed. Once the link is done one way, it is automatically done the other way; you only have to link the records once for everyone in the list to be linked to everyone else.
Important notes about linking patrons:
- The linked patrons feature is only for staff convenience in providing access and information that staff are lawfully permitted to provide by state statute and local library policy. Staff should not assume linked patrons are allowed to pick up holds for each other, check out items, or access account information.
- State statute permits parent and guardian access to library records for children under 16 at the parent or guardian’s request.
- If account access, like hold pickup permission, has been authorized by patrons, a note or message should be entered in the patron record(s), and permissions should be reviewed regularly. These patron records may also be linked. Find Holds Authorization Form examples on IFLS’s Policy Examples page.
- Linking patrons does not give anyone access to another’s records in the MORE Catalogs through My Account. This is a staff function ONLY.
To link patron records:
- All records to be linked must be entered in the database first.
- Open the record of one family member.
- Click on the Linked Patrons tab.
- Click Link.
- Choose your search: “name” to type in the name of the patron you want to link, or if you still have the library card, you can choose patron barcode and scan it in.
- If there is an exact match, the patron will be automatically linked; you will see their name in the list.
To go to a linked patron record from the record you are in, highlight the line of the patron you want to go to and click Go To Patron. That patron record will open.
If you wish to view the checkouts for a linked patron without going to their record, highlight the line of the patron and click View Checkouts. A pop-up window will list the checkouts. You can print it if you wish by clicking the print button on the bottom of the window.
To Unlink, highlight the line of the patron you want to unlink, and click Unlink